Tutorial 0: Unity 3rd Person Character Controller
-
Author: Brian A. Ree
1: Introduction and Tutorial Goals
Hello and welcome to our first little Unity tutorial. This tutorial requires that you have that latest Unity software installed, at the time of this writing the current version
is 2017.3.0f3. If you're new to Unity or you've been away for a while you might want to brush up your skills a little bit. Below are some links to get you up to speed.
The main focus of this tutorial is to show you how to import a 3d character, we chose an older one to demonstrate a few things, animate that character based on import controls,
and finally have that character run around the screen with a 3rd person camera view following our character.
2: Creating a Project and Scene
The first thing we'll do once you've got yourself familiar with Unity's basics is to create a new project. We'll call this project 'AnimTestsSmall', because we'll be doing some
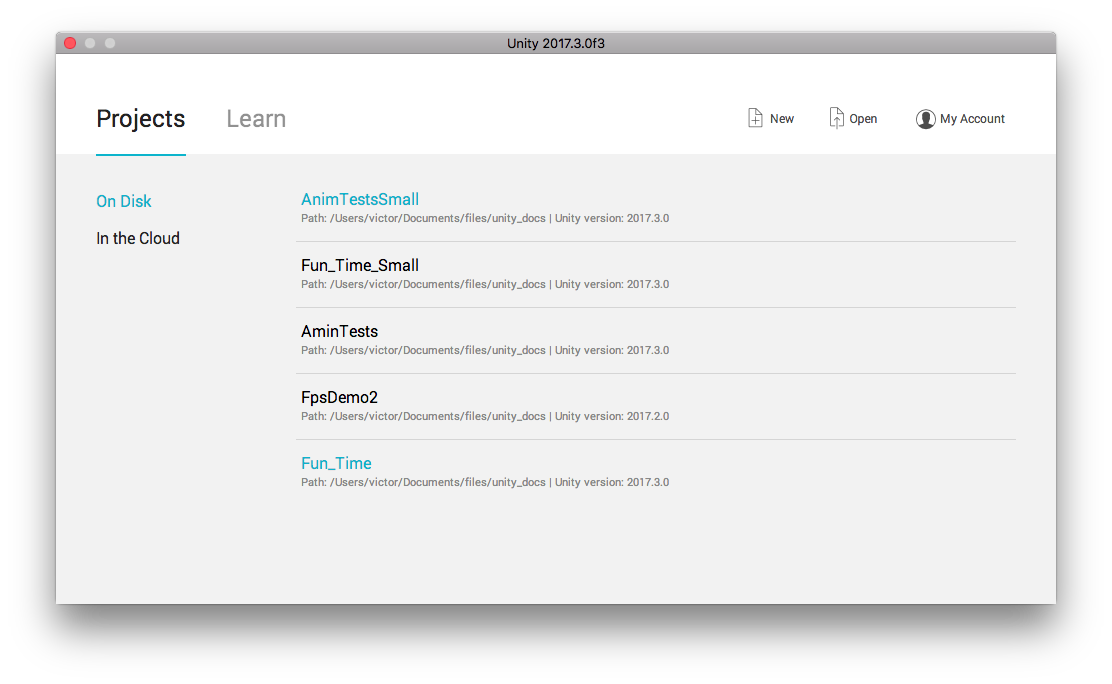
animation tests with only a few assets, so it's a small project overall. So let's fire up Unity and create a new project. The main screen gives you a list of your recent projects,
if you have any. In the top right corner you'll see a new project icon, click on it. See the screen shot below.

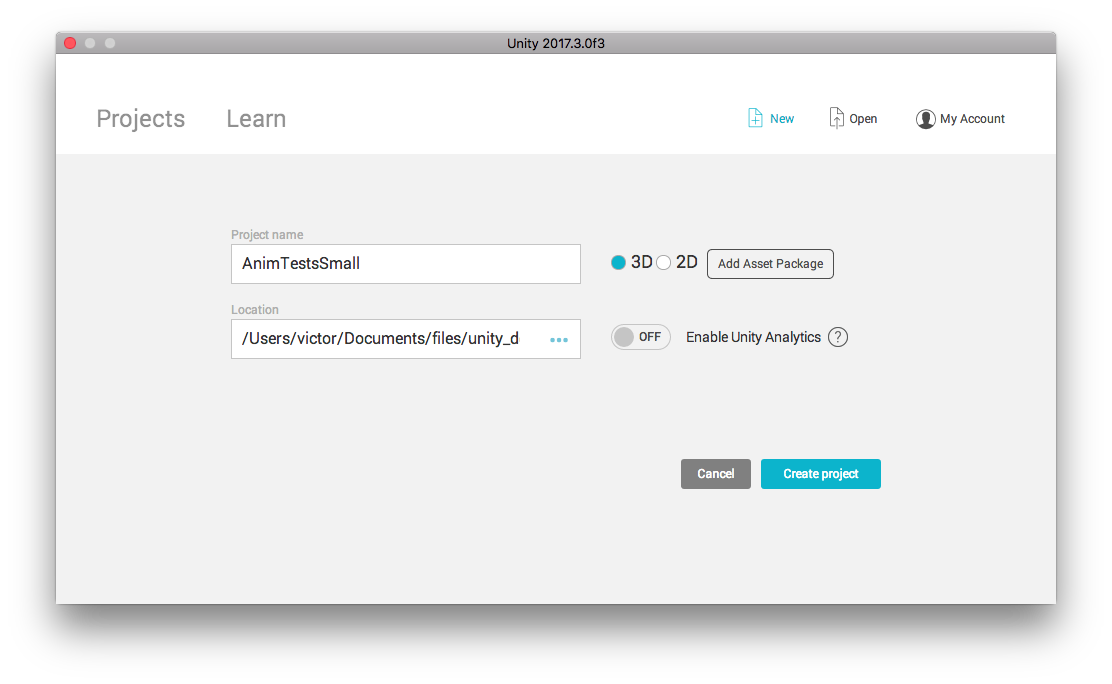
You'll be prompted to create a new project, I've called mine 'AnimTestSmall', as opposed to the very large anim test type of project. Specify a directory where you want to store your
project. I recommend creating a directory called 'unity_projects' somewhere on your main personal file system. Unity will create a folder in the specified directory with the name of the
project you've specified. Make sure you choose the '3d' option, as we'll be animating and controlling a 3d character in this tutorial. You can opt in to providing Unity with feedback, I think it is
a good idea generally because the software is so great and they are very liberal with their licensing so indie developers like me can access it. The only reason I would choose no is if you're system is
a bit taxed by Unity's requirements already, just because we have to assume it actually does something when we select yes and that takes up resources. As for me running this on a 13 inch Macbook Pro from circa
2012, I have to choose 'no'.

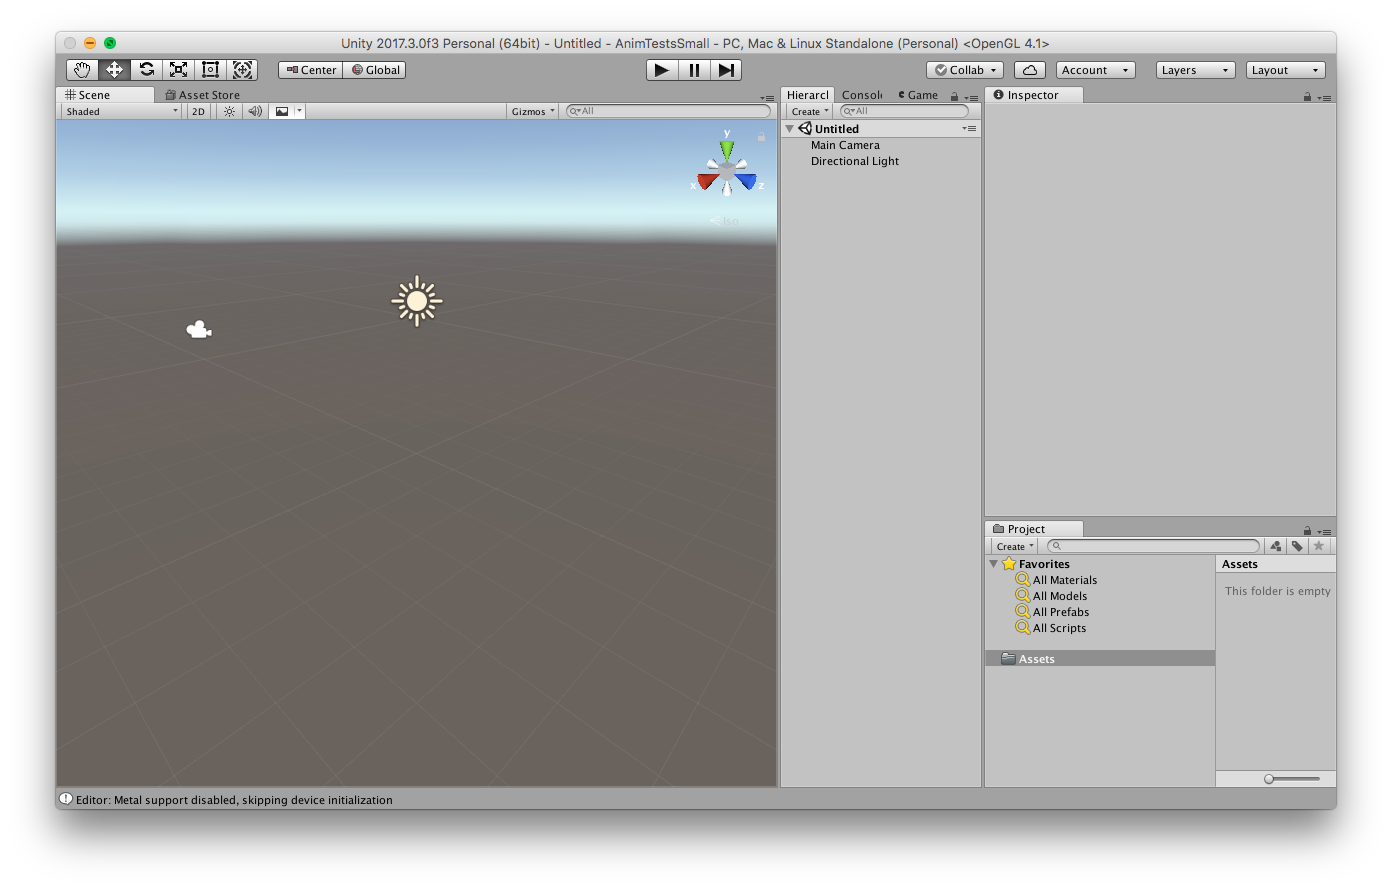
Below is a screen shot of a blank project in the Unity 2017.3.0f3 editor. You get a few things off the bat, a camera and a directional light. Your Unity editor might look different than mine.
I suggest you setup your layout in the way that makes you feel most comfortable. At the risk of providing too many links to the Unity3d documentation in a tutorial I've provided a link
to their workspace customization documentation. Unity documentation is quite possibly the best maintained documentation I've seen for software/APIs. Also, if something is missing or their is a user experience
question the Unity forum will usually have the answer.

3: Importing Standard Assets Into our Project
Ok, well we're going to have to give our character, also refered to as an agent, a place to stand. So let's create a surface to use as our 'ground'.
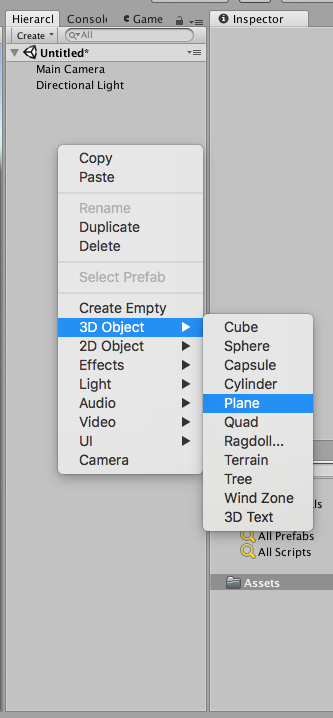
We're going to add a new 3d object to the scene, there are a few different ways to do this but we'll just use the context menu that is available in the scene hierarchy window.
As depicted below we'll quickly add a new 3d object, a plane, (not an airplane and I know it's a 3d object that only has 2 dimensions really but bare with me here...) to our scene.

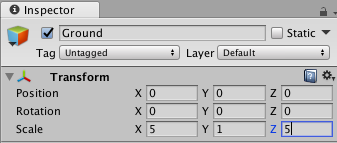
We're going to use the 'Inspector' window to edit our plane, we want to change the name to 'Ground' and we want to make some adjustments to the size of the plance. For convenience
I'm including a link to the Inspector documentation on the Unity site.

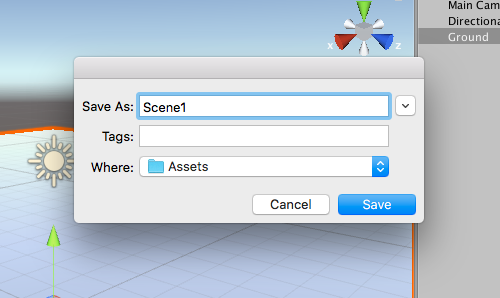
We're making some progress, and we've customized our scene a little bit so let's go ahead and save our scene and our project. To save your scene find the 'Save Scene' or 'Save Scene As' option in the
Unity menu system, this may or may not be a little different depending if you're running Windows or MacOS. I've called my scene, wait for it..., 'Scene1' and saved it directly to the assets folder.
The assets folder can be thought of as your creative tool box in a way, the things in it may or may not be actively a part of your scene but they are part of your project and you can drag and drop things
from your assets folder into your current scene. Things in your current scene are visible in the hierarchy window. The screen shot below shows the 'Save Scene As' dialog on a Mac. I usually make sure to also save my project
after saving the scenes in it. This is just a habit I have developed because I most likely want to keep any project level changes I've made thus far.

As If I haven't touted the awesomeness that is Unity enough we're going to import some Unity standard assets. Unity publishes a good amount of free content that demonstrates a lot of the functionality
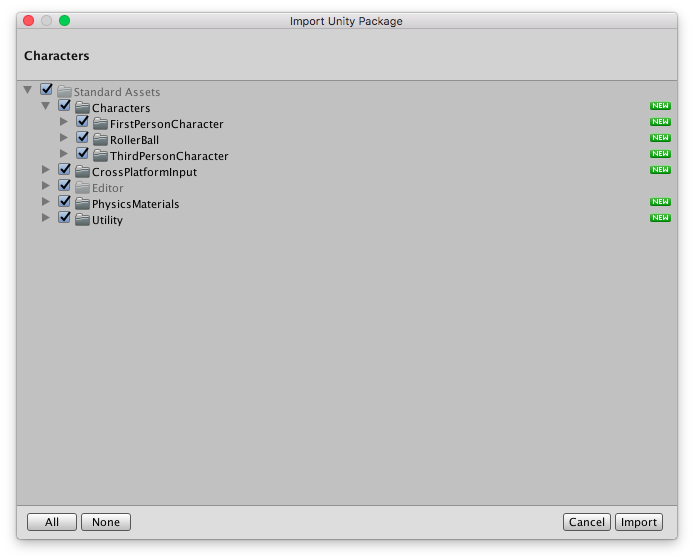
and features that their software supports, it is also a great starting point for most of the games you'd want to make. Find the 'Assets' menu, select 'Import' and then choose 'Characters'. This will popup
an asset import window. This window lets you choose what aspects of the Unity standard assets, characters, package you'd like to import. For our purposes we'll make sure to import all of it.
You can click the 'All' button on the lower left hand side of the popup window, most likely the default state will be to have everything selected. This will download, standard assets might already be on your local hard drive,
and import, for lack of a better word, the assets into your project's assets folder. Now we have more tools to play with in our creative tool box. The screen shot below shows the 'Characters' asset popup dialog with
everything selected for import.

So we have a few assets we can now play with in our scene and I'll show you how to do so in just a little bit. The next thing we want to do is get
a character to play with in our scene. Granted the character standard assets has some, but they're all wired up and modern and we won't learn as much by using them.
So for this tutorial we'll have to visit an old main stay of Unity, Kyle the Robot. He's an older model but I'll show you how to setup his import
and get him working under mechanim. Mechanim is the newest iteration of the Unity character/animation system. I'm kinda glossing over the details here as it is out of
scope of this tutorial.
4: Importing Asset Store Items Into our Projects
You can access the Unity Asset Store via your web browser and you can, very conveniently I might add, access it through the application itself.
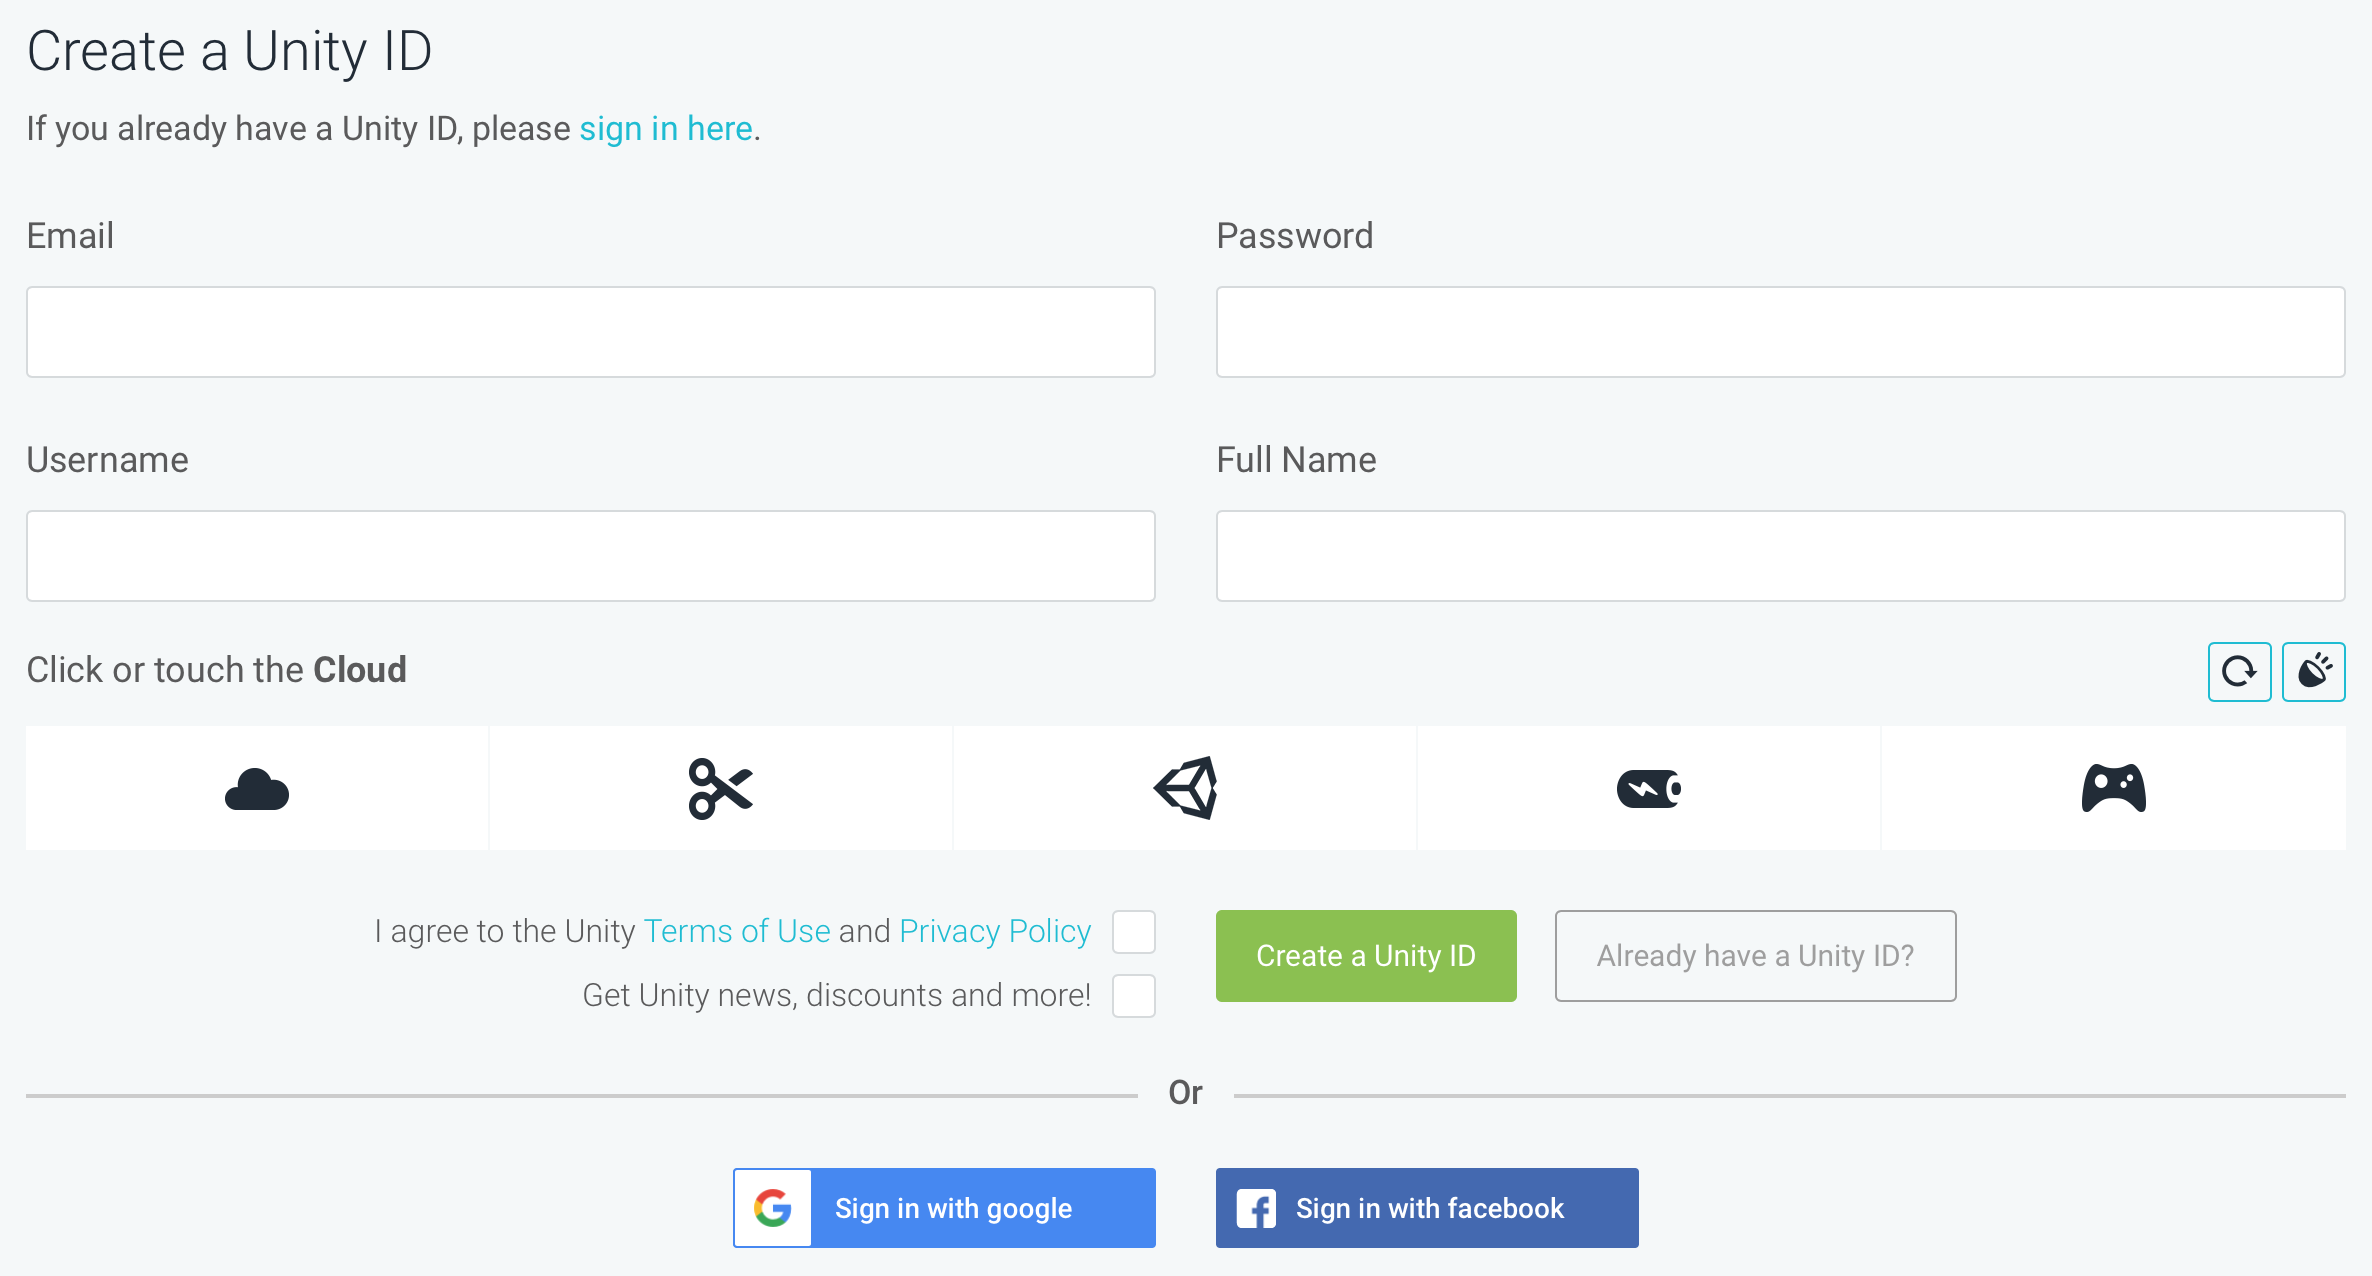
If you haven't done so already take the time to sign up with Unity, create an account, so that you can start accessing Asset Store assets.
A link to the account creation page at the time of this writing is provided below. A screen shot of the form also follows.

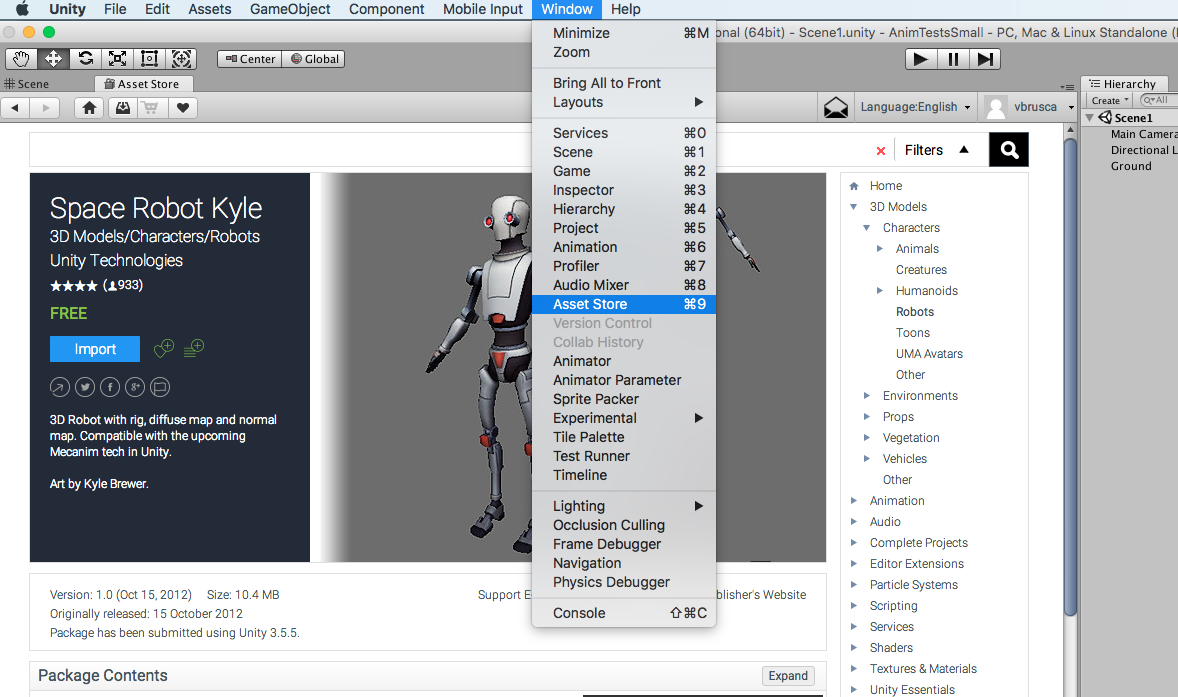
To browse the Unity Asset Store in Unity find the 'Window' menu option and select the 'Asset Store' menu item.
This will bring up a tab with the Asset Store embedded in it. A screen shot below depicts our target model, see if you can navigate to it by yourself.
I'll show you how to get there also, in just a bit. Now that you've created a Unity account, you can sign in either on the launch screen, where you choose an existing project
or make a new project or right here in the application on the Asset Store tab. On the top right corner of the Asset Store tab is a UI feature that let's you sign in to your account.

Feel free to take a look around the store, you can find a ton, lierally a ton, of assets in there. From music to models, to characters, to animations, to complete
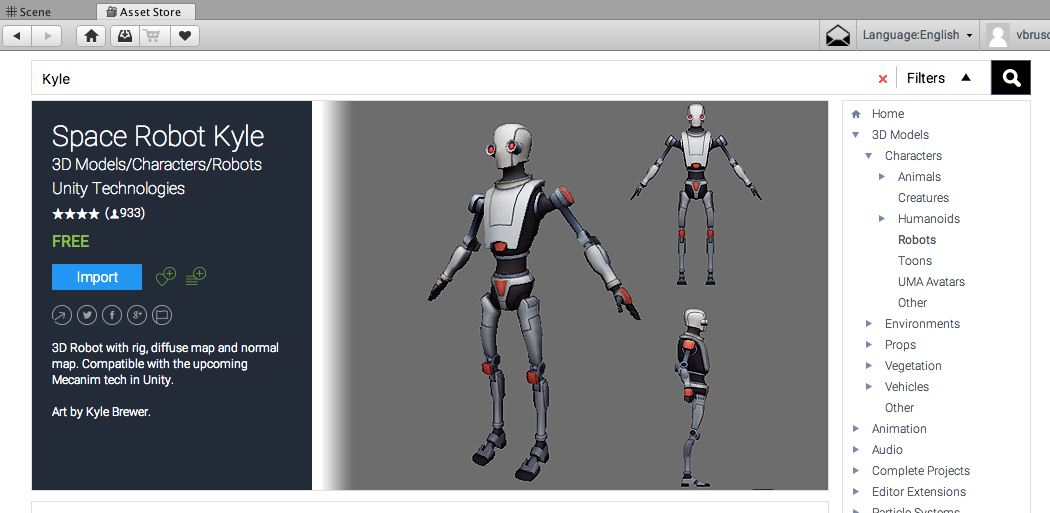
projects, complete games, and all kinds of tools to help you with your project. So let's go ahead and find Kyle. Locate the search bar at the top of the Asset Store tab.
Type in Kyle and see if you can locate the Kyle the Robot entry. The screen shot below depicts Kyle's cool asset page at the time of this writing, do I have to keep saying that?, lol.

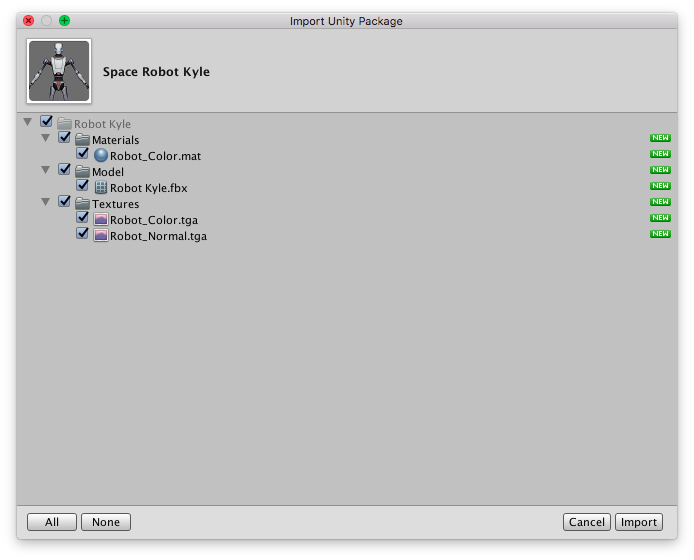
Click the import button on Kyle's page and you'll be prompted to import Kyle's assets into your assets creative tool box in the same way you were prompted
when bringing in the standard assets. As depicted in the screen shot below we're going to import all the items.

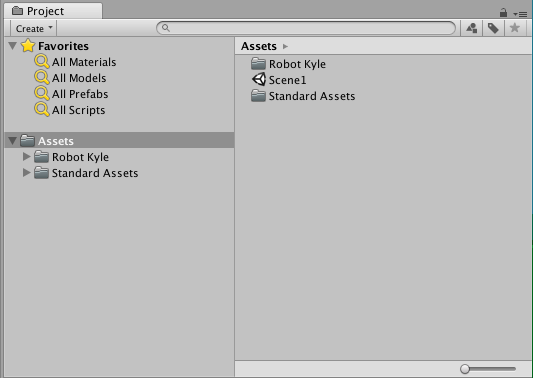
Your project window should match the screen shot shown below, roughly speaking. We have our Standard Assets import, our Kyle the Robot import, and our saved scene.
Let's take a moment to save our scenes and our project. Next up we'll be going over making adjustments to Kyle's import settings. This is an important step and can show you
how to utilize older characters from the asset store, newer mechanim characters follow a similar process but will require less work, not that it's in anyway difficult to get Kyle ready
to use. Unity does most of the work for us.

4: Getting Kyle Ready for our Scene
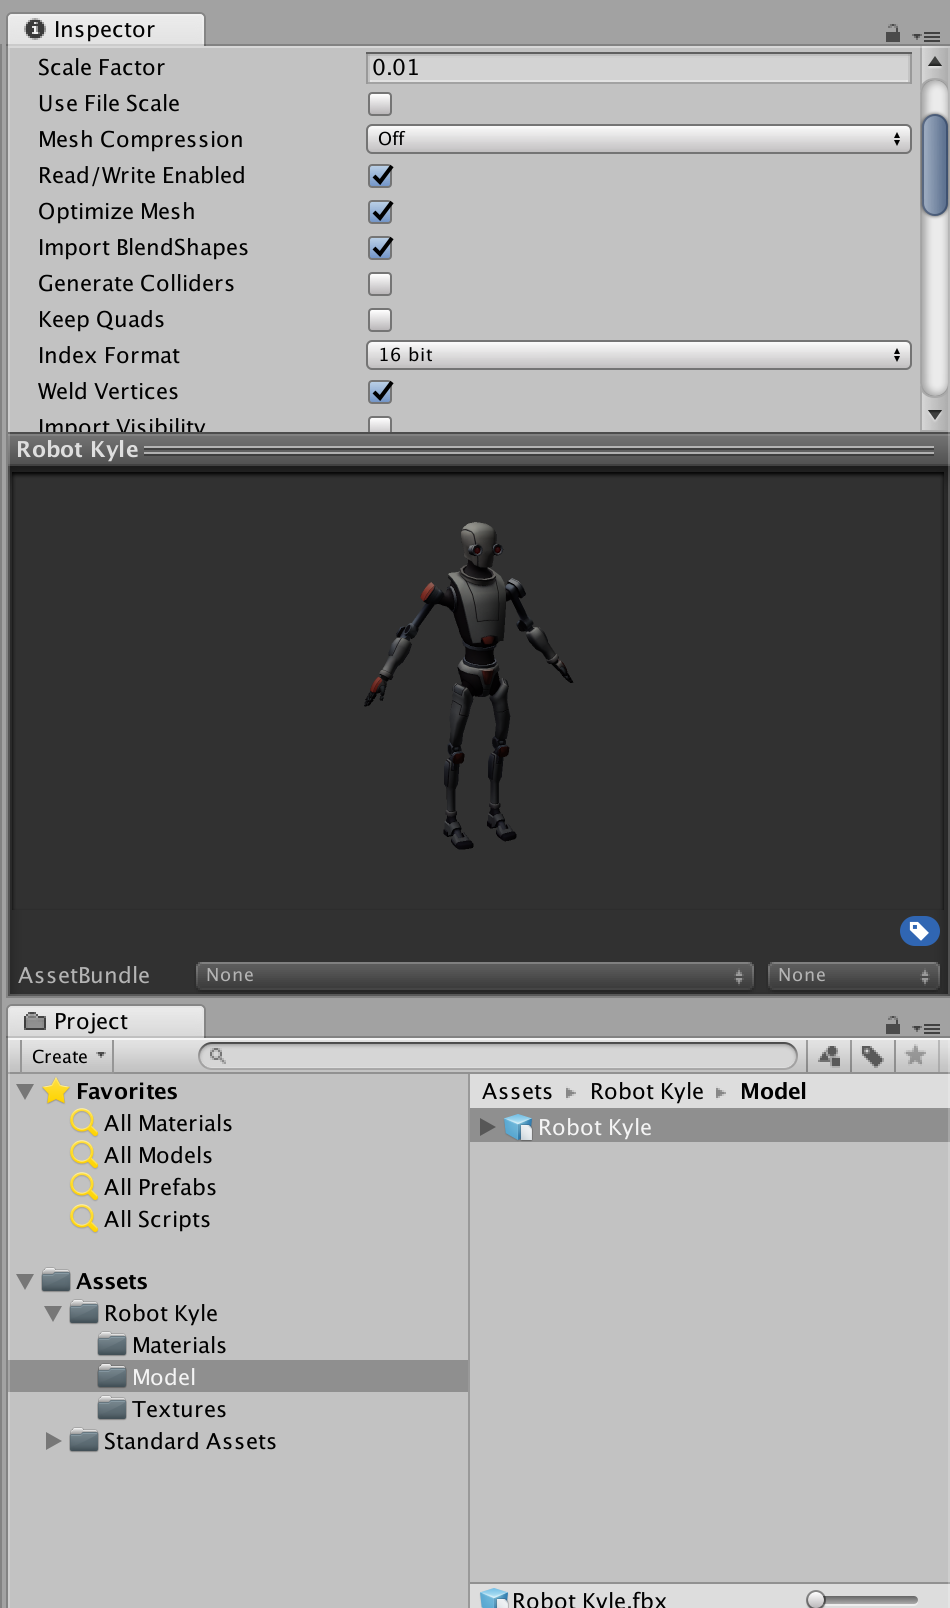
Take a moment to expand Kyle's folder structure and browse some of the assets that are included with him. See if you can locate his model.
If you can click on it so that it is highlighted, the screen shot below will show you where to find the model if you didn't locate it.
So even though Kyle is in our creative toolbox, Unity has - let's say - a certain view of it, a certain way it expects to interact with the resources that make
up our model. Because Kyle could have come from different 3d creation programs you have to expect that Unity has a flexible way to 'view' these resources.
If you notice when Kyle is highlighted the Inspector window has 'Robot Kyle Import Settings' as it's title. Now we've already 'imported' Kyle into our project but
there is another level to the way Unity interacts with the resources we bring into our project, it's not just a one time import, which is awesome. We can adjust how
unity 'views' our imported resources on the fly and that gives us a lot of power and control.
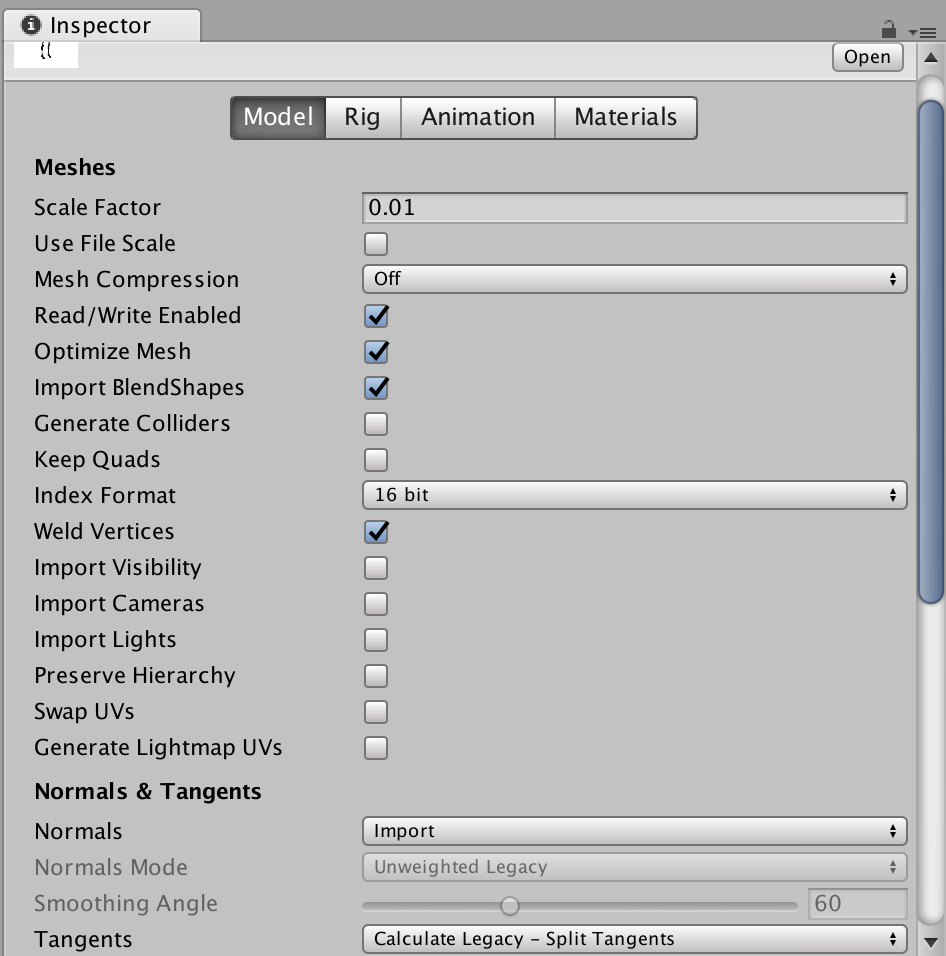
So follow the screen shot below, the options shown are on the model tab of the Inspector window when the Kyle robot model is selected. They should be the default settings but double check
your setup and make sure it matches the image. Notice the black bar at the bottom of the Inspector window if you click and drag it up you can view the 3d model and rotate it by dragging
you mouse around the model's view, this is a great way to check out a model quickly. Don't worry if your model is all grey I'll show you about the texture mapping next.


Do a quick scene save and a project save and let's move on to the next tab in Kyle's inspection window, the Rig tab. Since Kyle is an older model Unity should interpret him as
having a legacy type, I won't cover legacy stuff in this tutorial, but thanks to the awesomeness that is Unity we can tell it to try and import Kyle as a newer mechanim
model and rig. Sometimes you have to make adjustments to this process, we won't cover that here, turns out Kyle is pretty well setup and can easily be imported in the newer animation context.
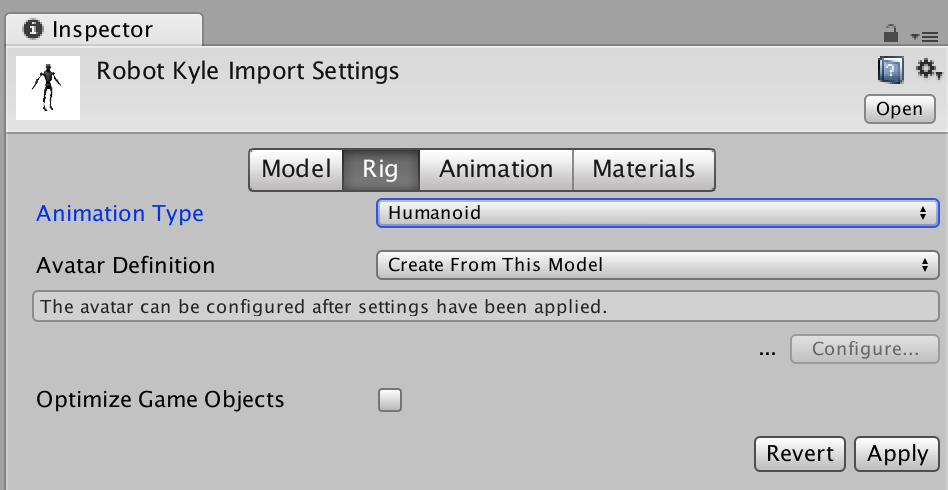
Change the 'Animation Type' to 'humanoid', set 'Avatar Definition' to 'Create From This Model' and click the 'Apply' button on the bottom right. You may be asked to save your scene if un-saved scene changes
are detected, go ahead and do so. The screen shot below shows the proper Rig tab configuration for Kyle. Again, keep in mind we are changing how Unity 'views' the Kyle model, even though we have imported
him into our project Unity let's us adjust the way it handles that import in a fluid and dynamic way long after we brought the resources into our project. Very cool.

Next up we'll adjust the 'Animation' tab, now we're not going to be using legacy animation, we're expecting to use mechanim animation designed to work with the bone structure
of our rigged model Kyle. So uncheck 'Import Animation'. I know, I know, but why? Well with the newer machanim system we can apply animations not designed specifically for Kyle
but animations designed for a generic humanoid rigged model, this means we can easily apply animations to Kyle that the original model creator never even dreamed of. Again make sure to hit the
'Apply' button and save your scene if you are prompted to do so. Next up is materials.

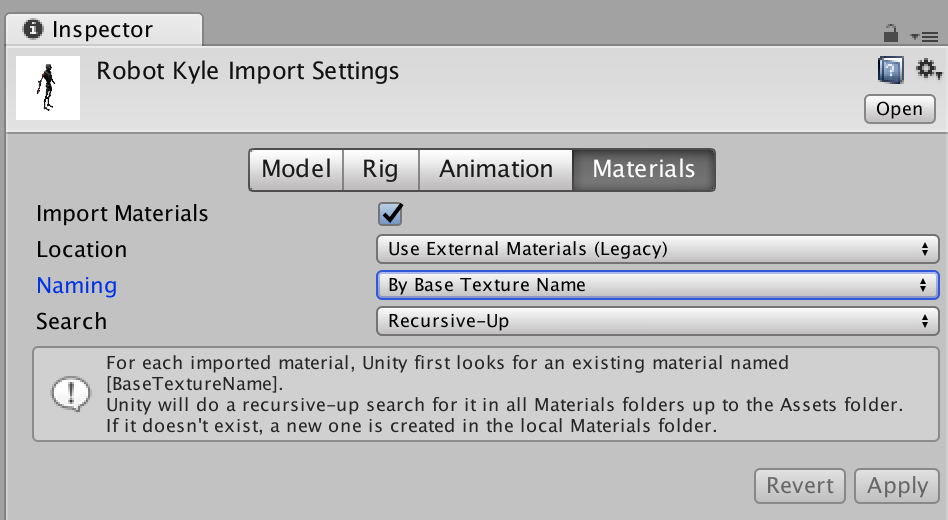
Click on the 'Materials' tab and make sure the 'Import Materials' option is selected. Now Kyle is an older model so set 'Location' to 'Use External Materials (Legacy)'.
The 'Naming' option should be set to 'By Base Texture Name' and the 'Search' option should be set to 'Recursive-Up'. I can't say that these settings will work for every legacy
model but you can play around with them and view the model in the model sample space to make sure it has the proper materials applied. See the screen shot below.

5: Adding Kyle to our Scene with Some Physics
Now that we've adjusted the import settings for Kyle to what we want. Let's drag and drop the 'Robot Kyle' model (blue cube with a tiny peice of paper in front) from the project
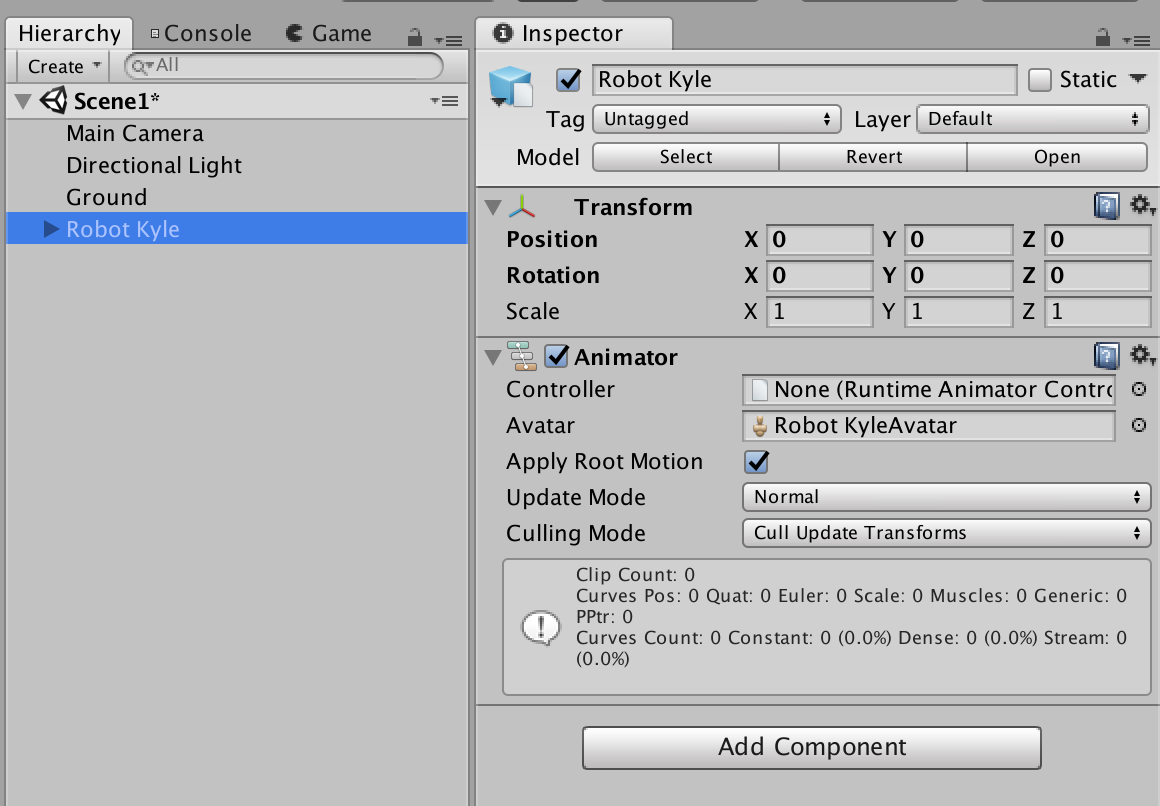
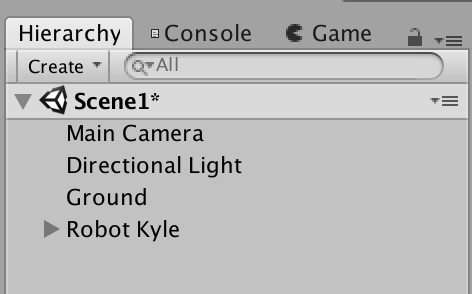
window onto the Hierarchy window. You should see something similar to what's depicted in the screen shot below. Notice that when you unselect 'Robot Kyle' in the Hierarchy window the letters of
the label are blue. This indicates a prefab connection. Meaning changes that you make to this instance can be applied to the original model and all linked instances. We don't really want that for right now.
I want to keep the original Robot Kyle prefab intact and exactly how it was when we imported it. So select the Robot Kyle instance in your Hierarchy window and find the 'Game Object' menu.
Click it and choose the 'Break Prefab Instance' menu option. The color of Kyle's label should now be black. Save your scene and project.
I'm glossing over prefab stuff because this tutorial is mainly focused on character animation, a down and dirty simple scene. The link below should provide you with more information
on prefabs and instantiating editing them etc.


Next up we'll have to adjust Kyle so that we can get a good view of him as we'll be adding a capsule collider from the 'Game Component' -> 'Physics' section.
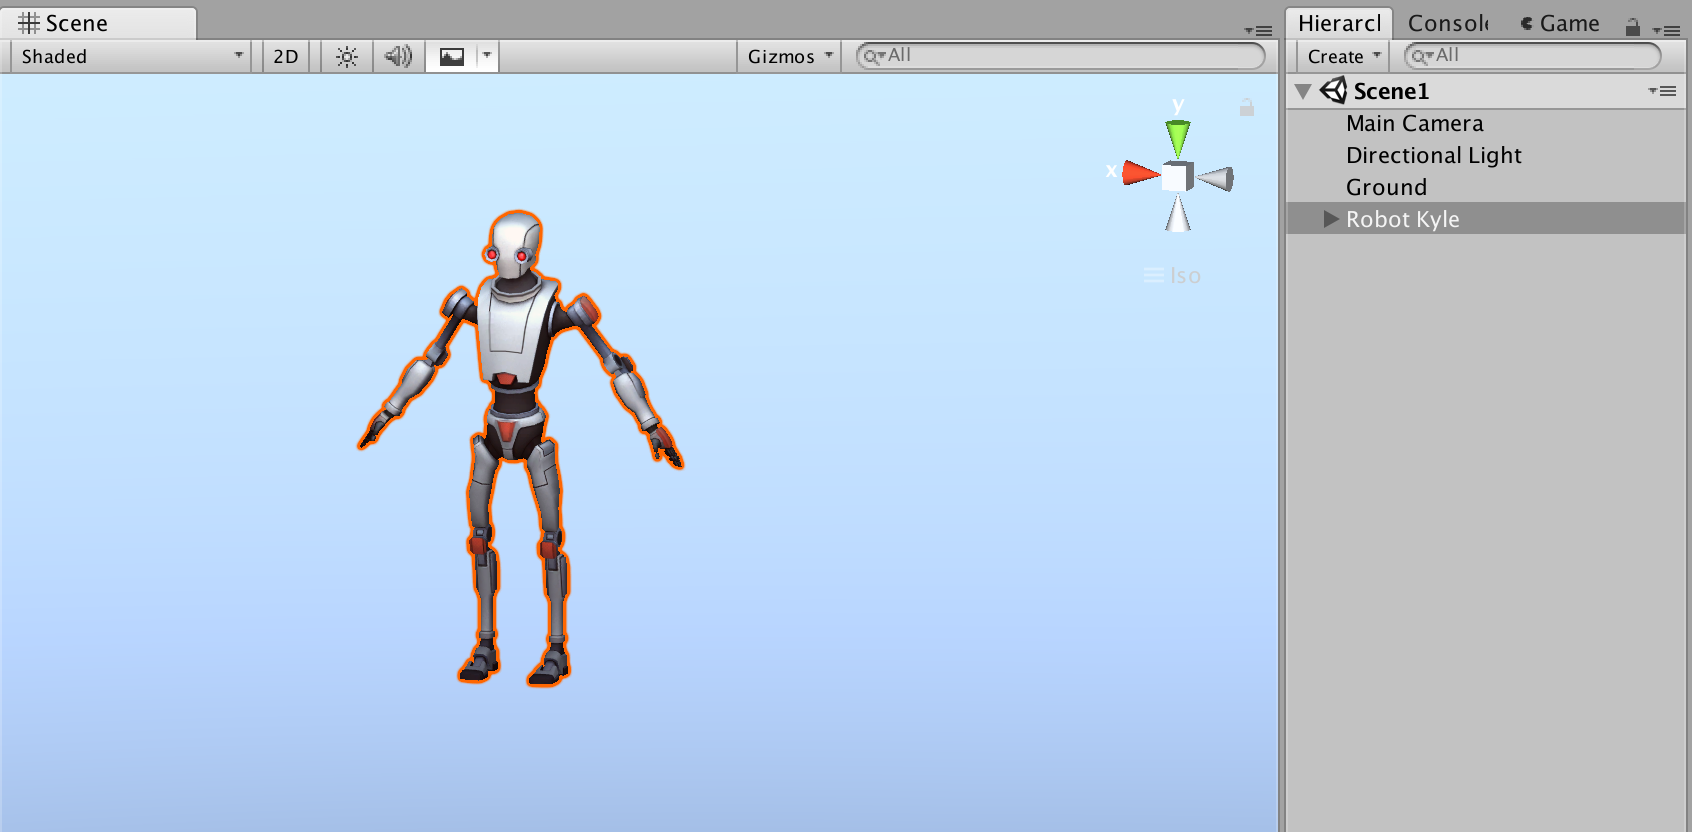
First focus your attention on the Scene window in the top right corner and find the little 'Persp' text next to a few expanding lines, not sure how to describe it it's very much like
a tiny camera projection field. Alter it so that you're in 'Iso' mode and click the Z-Axis, blue axis, in the axis descriptor above the text. Use the hand to pan the editor camera so that Kyle is in
the center of the Scene view. Press the alt key and then drag the mouse slightly so that you can get a good ISO view of Kyle. Follow the screen shot below to get things setup similarly.
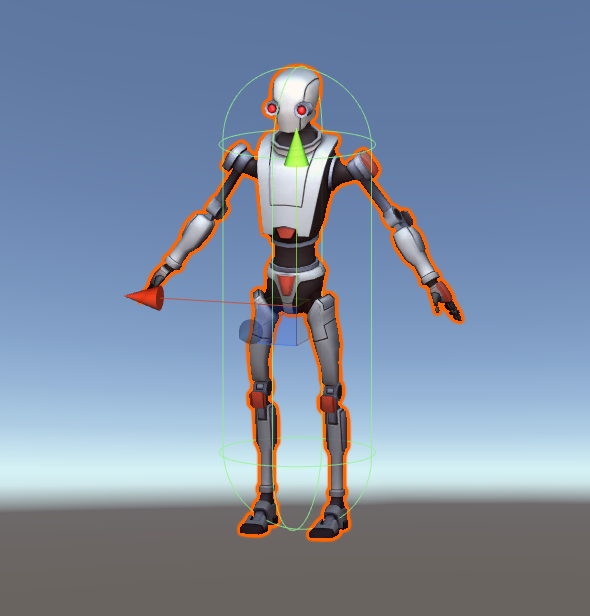
It doesn't need to be perfect we're just going to add a capsule collision Game Object to Kyle and we want to be able to see how it fits around his body.

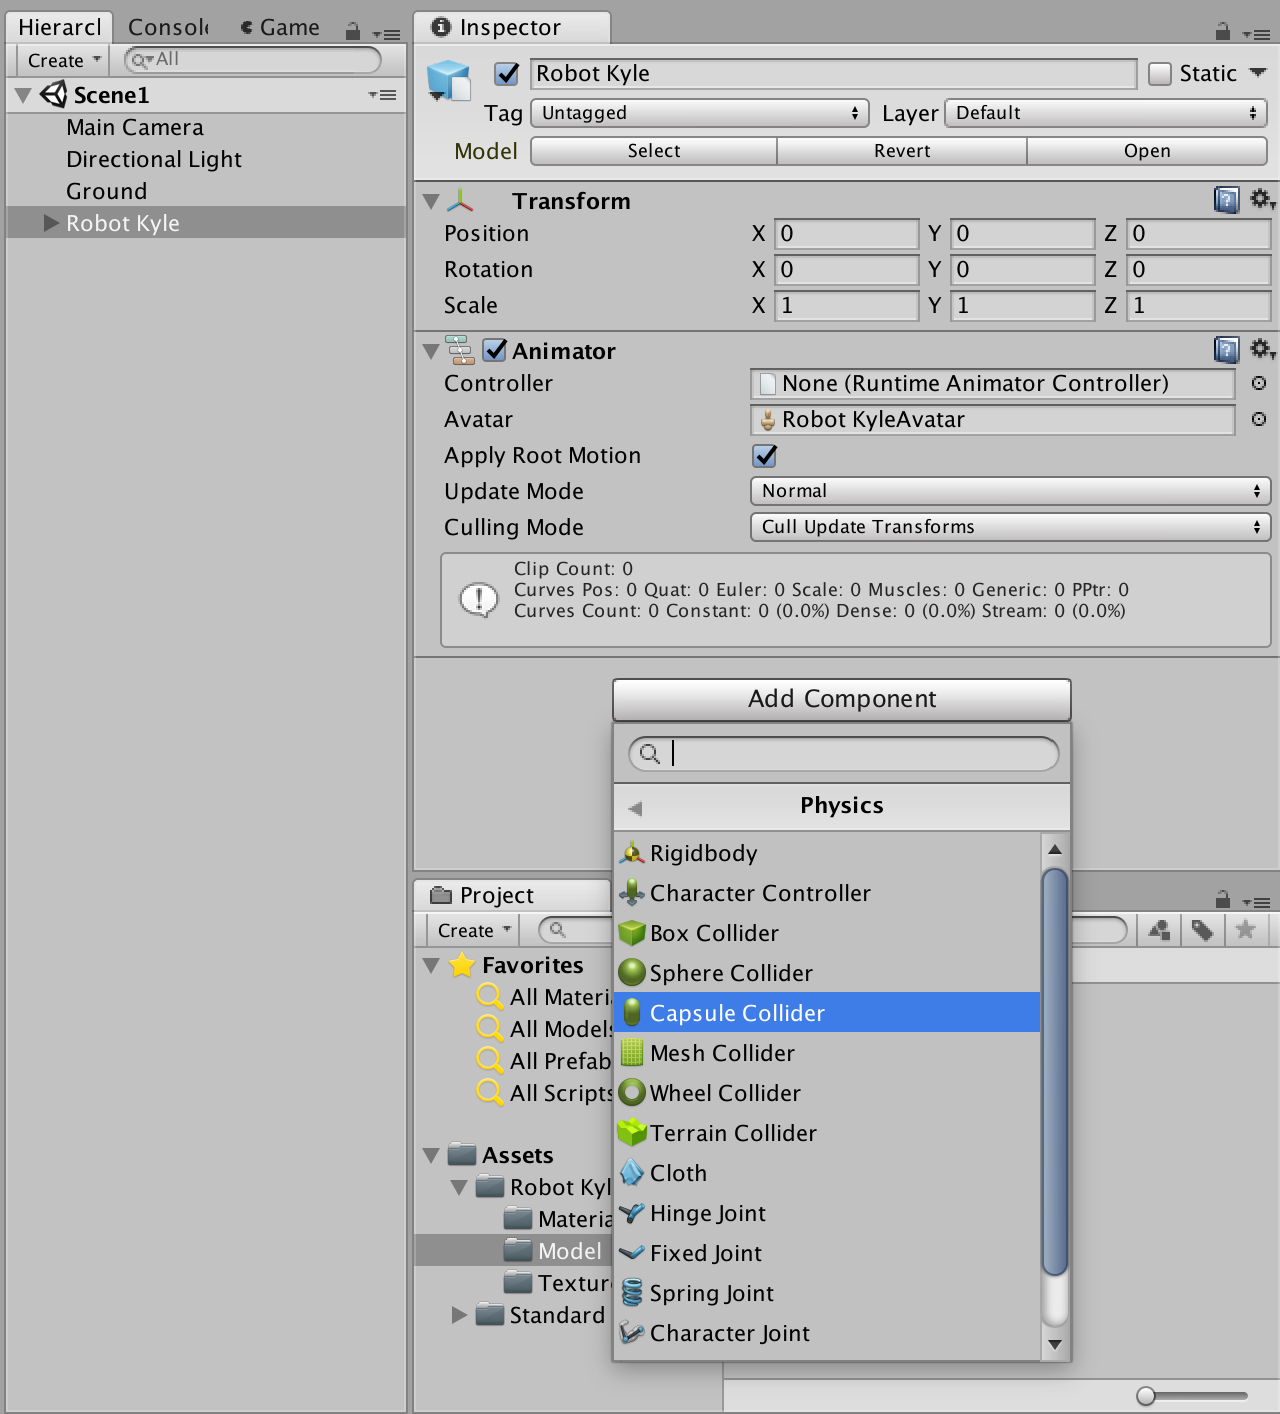
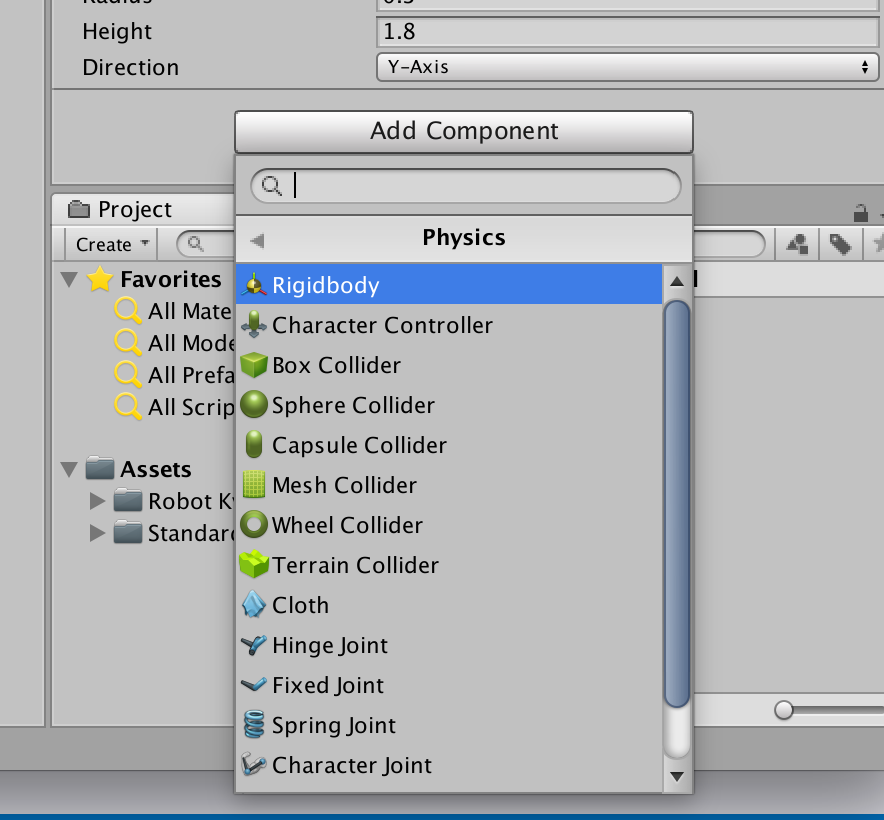
Select Robot Kyle from the Hierarchy window and find the 'Add Component' button in the Inspector window. Click it, and go to 'Physics' then select 'Capsule Collider'. The screen shot below shows
the Capsule Collider selection. We'll go over the proper Inspecter window settings for this collider.

If it's hard to see the outline of the Capsule Collider turn off the Ground plane as depicted below. It'll make it easier to see the green
outline of the Capsule Collider. Simply check the checkbox next to the Ground Game Object's label in the Inspector window.

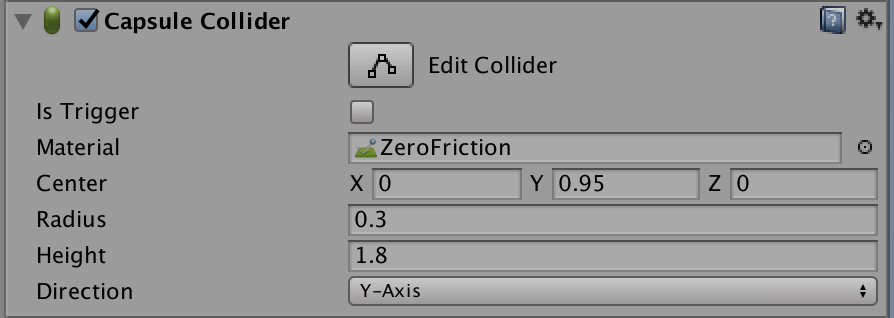
Set your Capsule Collider to have the following attributes, as depicted below. This should results in a Capsule Collider that matches the screen shot below with
the Capsule Collider properties. For the 'Material' option we're going to set the Capsule Collider to have no friction at all, we get to use some of our imported standard assets.
Click the little circle next to the 'Material' option and start typing 'Zero' into the search box, select the 'ZeroFriction' material.

Our Robot Kyle should look like the following. Verify your setup then turn the Ground plane back on by checking the checkbox next to the label
in the Inspector window.

Hang in there I know we've covered a lot but we're almost there. Next up we're going to add a Rigid Body Game Component to our Robot Kyle
so that Kyle can experience the wonderful world of physics. This process is similar to the Capsule Collider steps you've just completed.

6: Animating Kyle as a 3rd Person Character
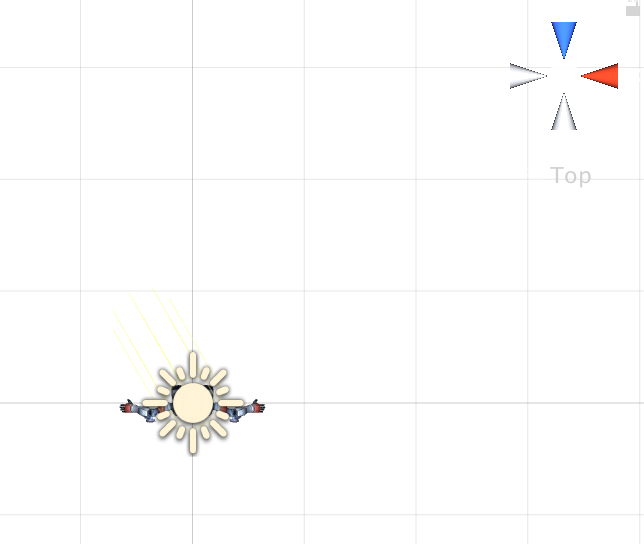
We're almost there. Set your Scene window to the 'Top' view. Center it around Kyle by using the hand to pan the editing camera.
You'll see that the default directional light is right on top of Kyle. Let's move it out of the way by changing it's Z-Axis position.
Take a look at the next two screen shots to get this step done.


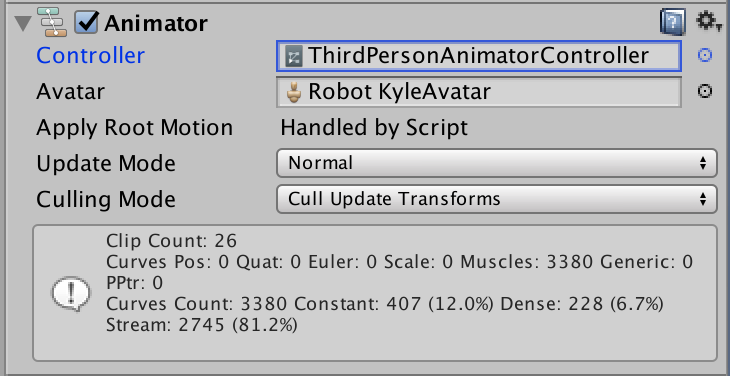
Next we're going to use another one of our Standard Assets and set the Controller for Kyle's Animator component. This is a default controller that handles animating running
and jumping. Click the circle next to the 'Animator' entry and find the 'ThirdPersonAnimatorController' Game Object. See the screen shot below for a reference.
The animator controller does just what it sounds like it does. It handles controlling Kyles animations.

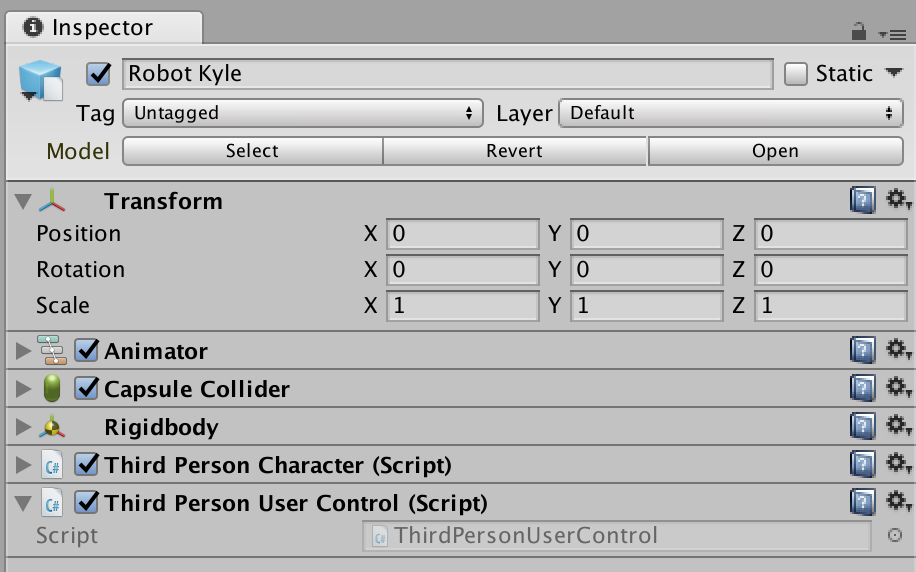
Now we'll add some scripts that handle connecting our input to Kyle's movement, and then pass those movement values into the Animator Controller so that
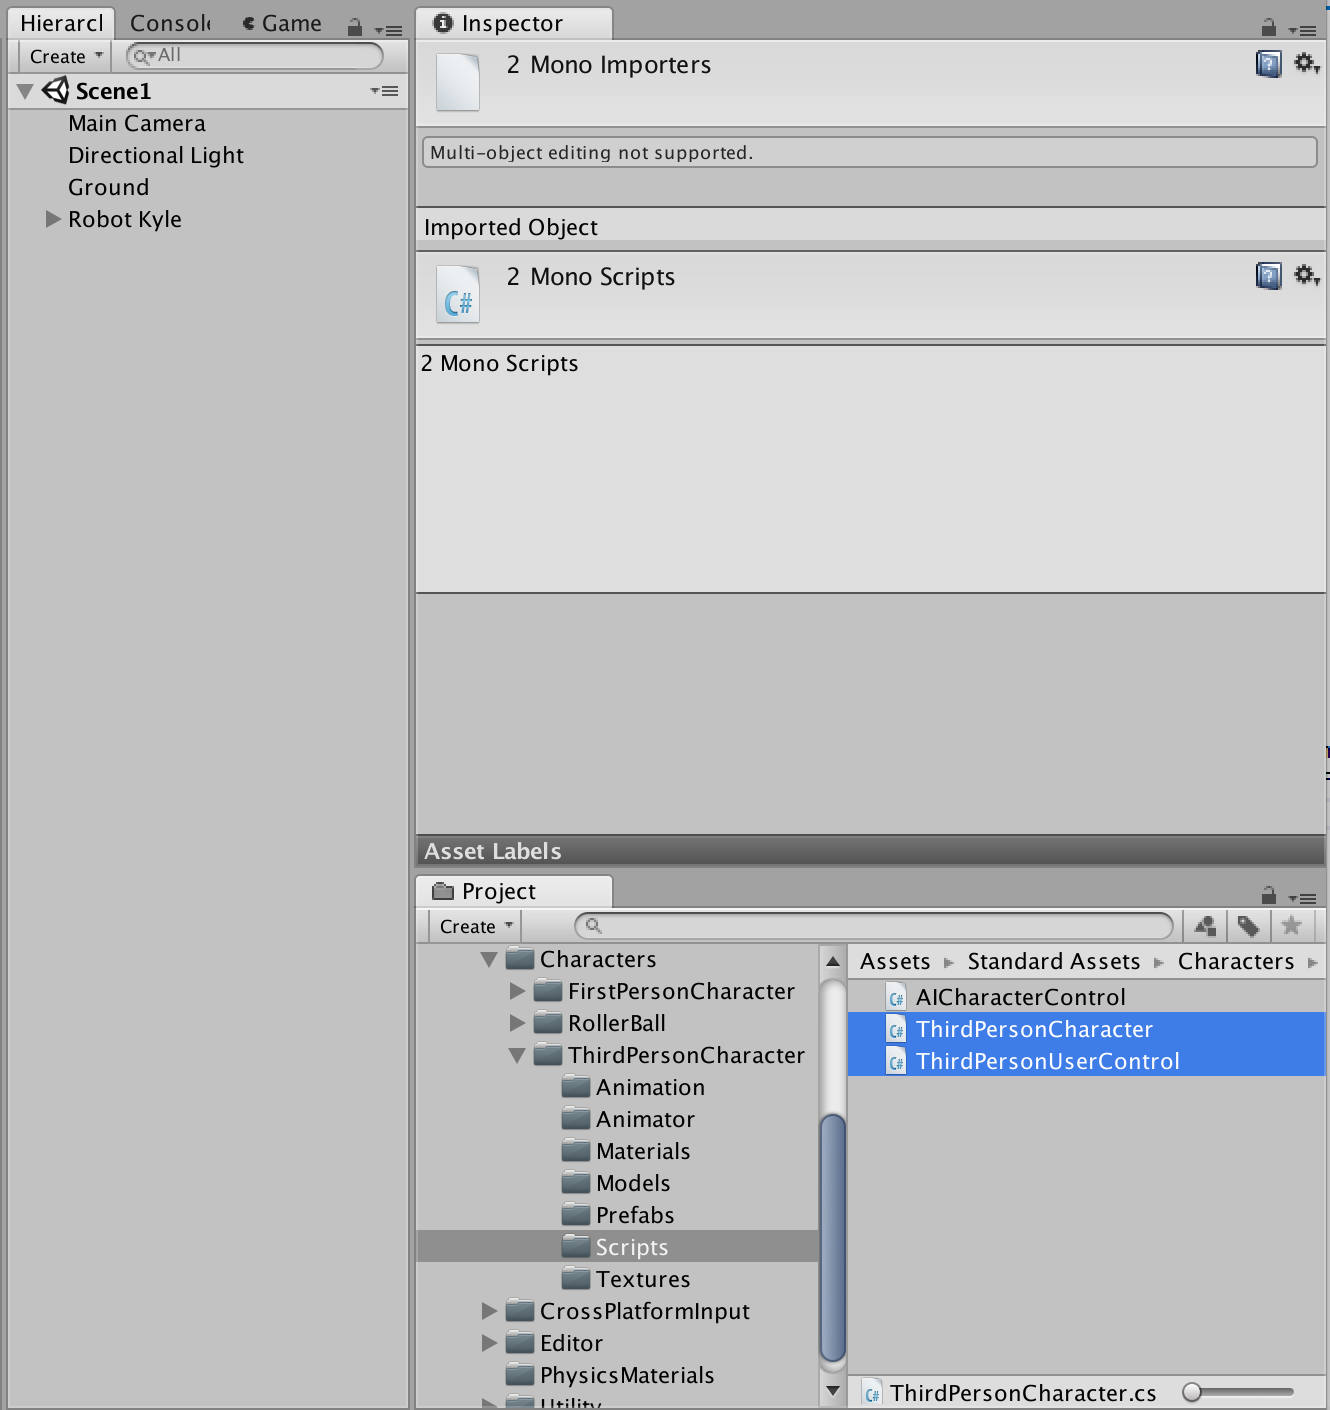
the controller can change the current animation accordingly. Find the 'Scripts' folder in the 'Standard Assets' folder of your Project window.
Drag the two scripts 'ThirdPersonUserControl' and 'ThirdPersonCharacter' onto the 'Robot Kyle' entry in the Hierarchy window.
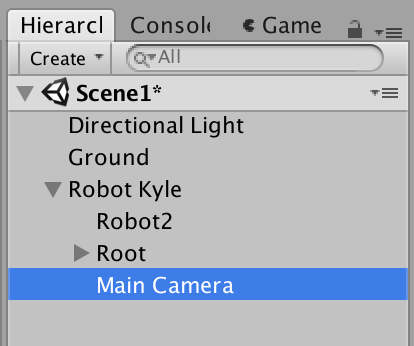
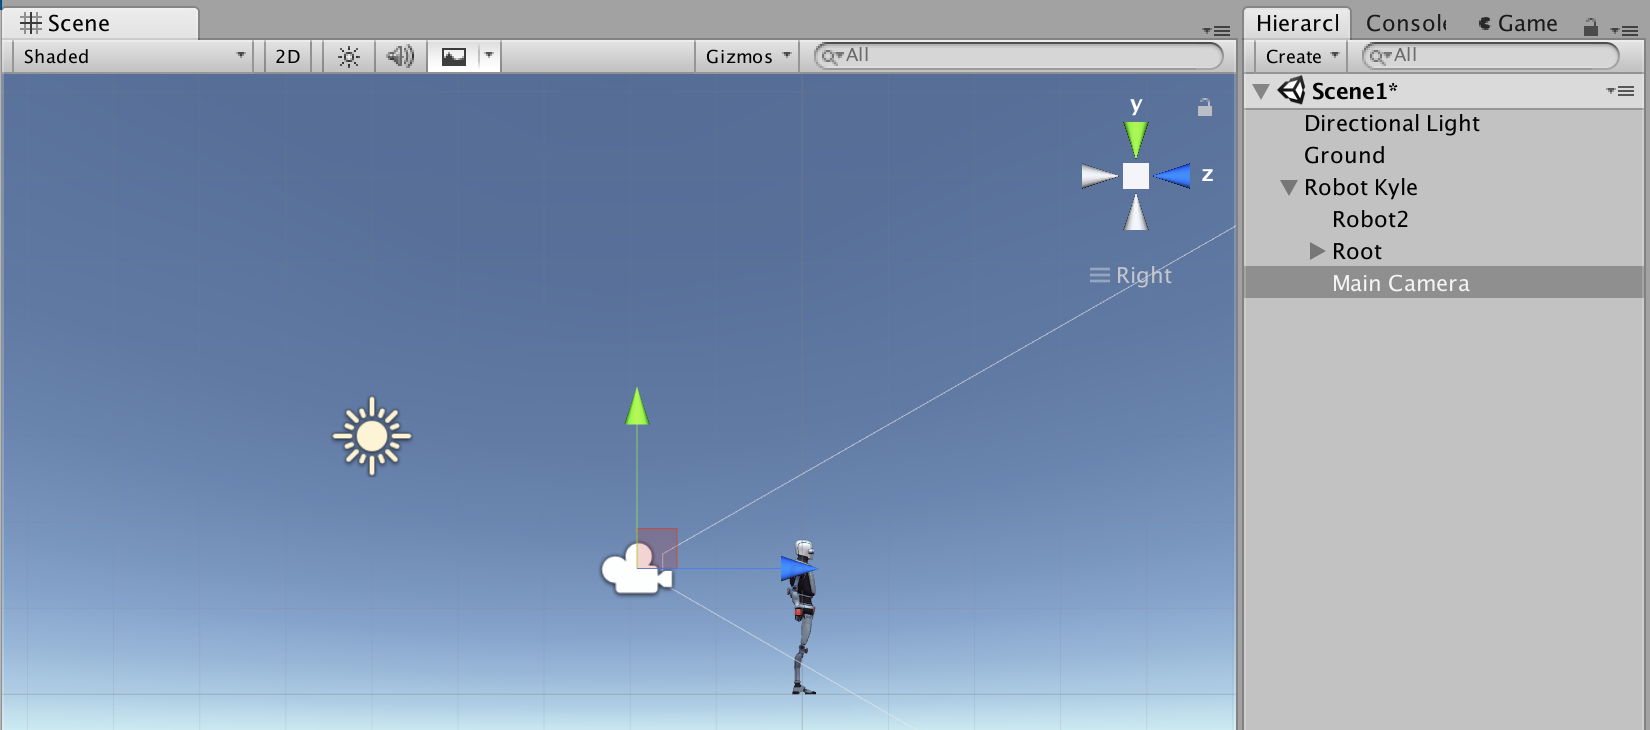
Now drag the 'Main Camera' onto Kyle so that is becomes a child of the 'Robot Kyle' Game Object. Reference the following screen shots.


Now expand the 'Robot Kyle' Game Object in the Hierarchy window and select the 'Main Camera'.
Set the Scene window to Right or Left view and move the camera so that it is just a little bit behind Kyle.
Make sure to save your scenes and your project. Press the play button and use the direction keys to move Kyle around your little world.
Be careful of the edges or you'll fall off, infinitely. You can stop the game test by clicking the play button again so that it's black.
Press the space bar to make Kyle jump. See the screen shot below for an example of the camera placement.

7: Extra Stuff
Try checking the 'Is Kinematic' checkbox on Kyle's Rigid Body Game Component. Press play and run the game. Notice that Kyle animates, sort of,
but doesn't actually move around the world. Remind you of anything? This is the basis for an infinite runner style game where the character is actually
stantionary and the world animates past our character. Very cool.
