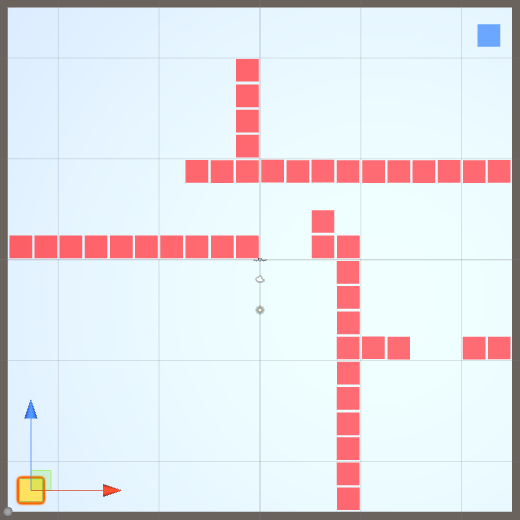
Tutorial 2: Unity A-Star Path Finding Demo
-
Author: Brian A. Ree
1: Introduction and Tutorial Goals
Hello and welcome to our third little Unity tutorial. This tutorial requires that you have that latest Unity software installed, at the time of this writing the current version
is 2017.3.0f3. If you're new to Unity or you've been away for a while you might want to brush up your skills a little bit. Below are some links to get you up to speed.
The main focus of this tutorial is to show you how to create an efficient A-Star navigation that finds a path through obstacles to a set goal. You'll get exposure to
importing custom Unity exports, working with scripts - at a higher level we won't delve into coding too much here.
I recommend purchasing and reading Unity AI Game Programming - Second Edition, don't overlook
this book, it's a great crash course into Unity AI and after having read it twice I think it's a solid title for those getting into the scripting side of Unity, specifically game AI. Most games require AI
on some level and this book will get you started quickly. This toturial is based on the AStar chapter of this book but adjusted to run more efficiently, less garbage collection - more
baseline memory use etc.
2: Getting Setup
Ok so let's get a project to work with and start learning. You can choose to download the finished project above and just follow along or you can choose to download this starting project
and complete all the changes yourself. It's up to you. The first thing we'll do is download our scripts export here. You'll want to unzip it and
store it somewhere useful. I like to add a 'unity_exports' folder in the same folder I keep my Unity projects. Once it's ready fire up Unity and open the project for this tutorial.
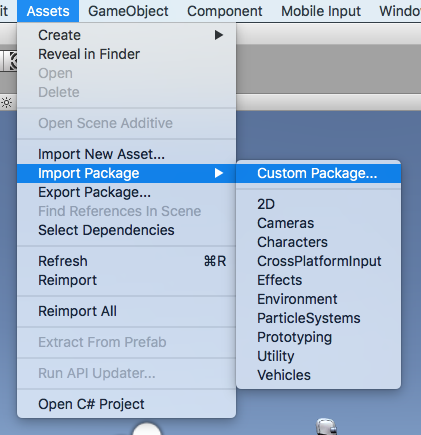
Find the 'Assets' menu and choose 'Import Package' then select 'Custom Package...'. You'll be asked to browse to the custom package you want to import. Locate the 'mmg_scripts.unitypackage' you unzipped earlier
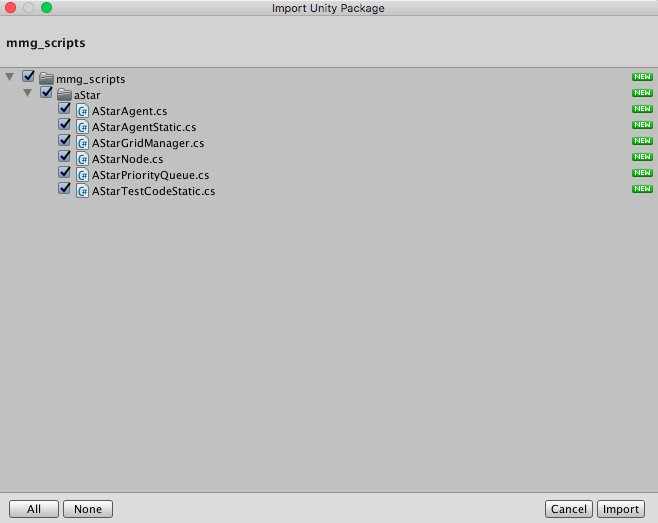
and select it. You'll be prompted with a standard Unity import popup. Make sure everything is selected and click 'Import'. The screen shots below demonstrate the menu option and the import dialog.

Selecting the custom import option.

Be sure to include all the scripts in the import package.
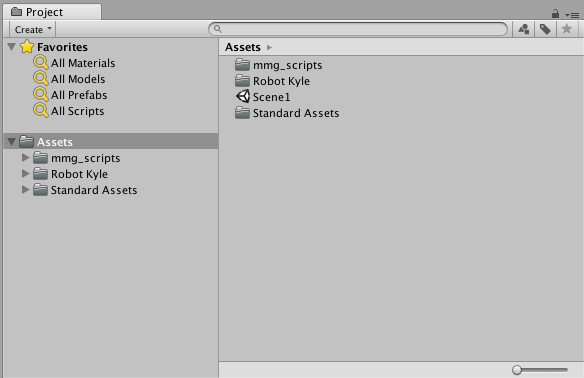
Your Project window should look like the following screen shot. Let's recap, we have our scene with a ground plane, Kyle the robot which we can control and he's animated to
walk left, right, and jump. We've just imported our AStar pathfinding scripts and we're ready to start setting up some obstacles to find paths around, otherwise it would just be too easy.
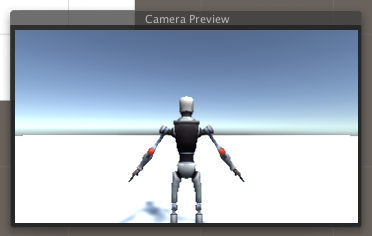
And I do so love making tons of screen shots, lol. If you want to get a preview of what the camera is looking at expand the 'Robot Kyle' Game Object in your Hierarchy window and select the
'Main Camera', you'll see a camera preview in the corner of your Scene editing window. See below for screen shots showing the camera preview. Next we'll start setting up obstacles and we'll cover
adding tags to your project.

Your project window should look something like this.

A quick check shows our camera is right behind Kyle, good to go.
Now we're going to start adding some scripting power to our project. We can't just drag and drop scripts into the Hierarchy window because they are Components not Game Objects.
So we're going to create an empty Game Object to house some of our scripts. You see this a lot in Unity and although it may seem strange at first it works very well with the game design
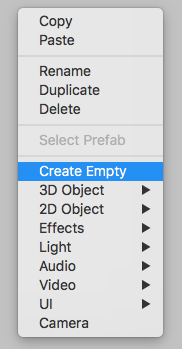
flow that Unity creates. Right click in the Hierarchy window and select 'Create Empty' as depicted in the screen shot below. You'll see that you have a new Game Object in the Hierarchy window.
Select it and set it's Inspector window attributes to match those shown below, we want to name this Game Object to match the script it will represent, this is what I usually do to keep track of what
the game object represents. We'll also center it to world 0, 0, 0 just to keep things clean. Take the time to name, sort, organize, and position things properly it will pay off in the end and you'll
see that it will save you time. Make sure to save your scenes and project.

Add a new empty object to your Hierarchy window like so.

Label and position your empty object.
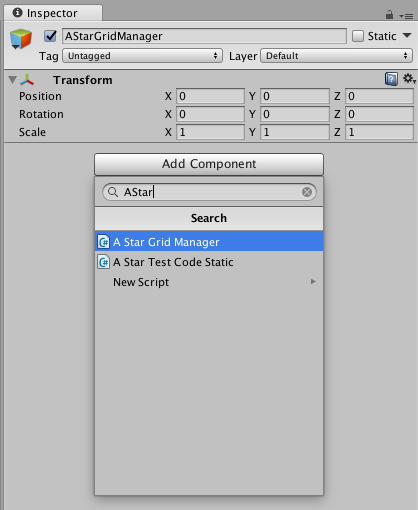
Now we're going to add a component to our 'AStarGridManager' Game Object. Select that object in your Hierarchy window and click the 'Add Component' button in the Inspector window.
Type 'AStar' in the component search bar and you should see a list of scripts that have AStar in their name. Select the 'A Star Grid Manager' from the list. This step is depicted in the screen shot
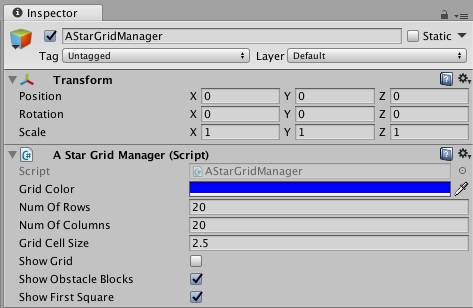
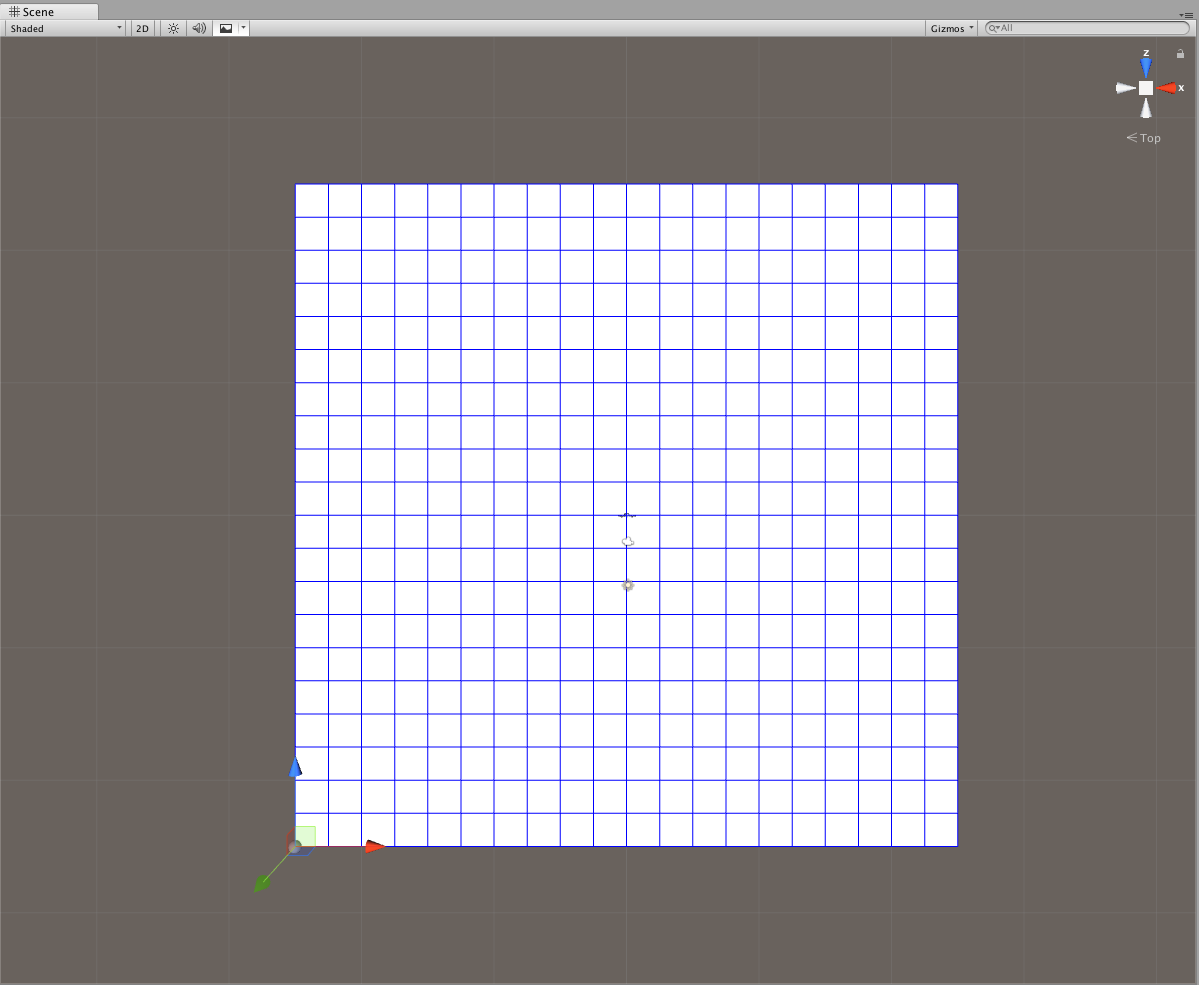
below. Once the Script Component has been loaded we'll set the 'Num of Rows' to 20, the 'Num of Columns' also to 20, and the 'Grid Cell Size' to 2.5. Since our empty Game Object was centered you should see a blue grid
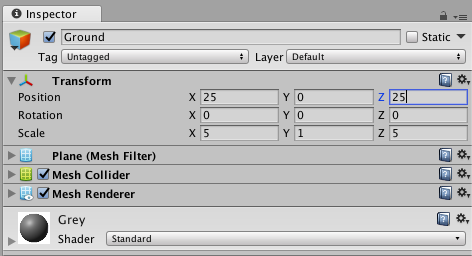
offset and overlapping our ground plane. Let's adjust that, set the X value of the 'AStarGridManager' to -25, then set the Z value to -25, now the grid should match up perfectly with out plane as depicted below.
For more information on Components check out the links below.

Add a new Script Component to our AStarGridManager Game Object.

Set the properties for our Script Component, the position is important here, let's keep the coordinates positive.

Set the Transform properties for our Ground Game Object.
Your Scene window should look like the following screen capture, try toggling the different check boxes that are part of the 'A Star Grid Manager' Script Component.

Your Scene Window should look similar to this (Excuse the distortion of the blue grid, it's due to scaling).
Now let's add some obstacles to our scene. But before we do that we need a quick way to identify those obstacles. This is where tags come in. See the link below
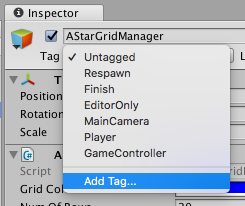
for more information on tags. Select an object entry from the Hierarchy window, go to the Instpector window and look for the 'Tags' drop down right below the
Game Object's label, you should see the word 'Untagged' there. Expand the drop down list and select 'Add Tag ...'. At the top of the window should be a 'Tags' section.
Click the little plus sign at the bottom of that section and type in the work 'Obstacle' and save it. You should now see 'Obstacle' in that tag list as well as in the
'Tag' drop down list. Save your scenes and project.

Adding the 'Obstacle' tag to your project's list of tags.
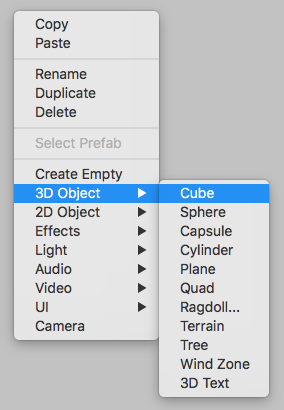
Now it's time to create some obstacles for the AStar path finding code to avoid. We'll use cubes for this, so add a new cube to your object as the screen shot below depicts.
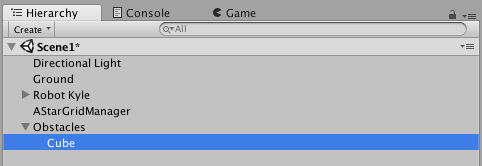
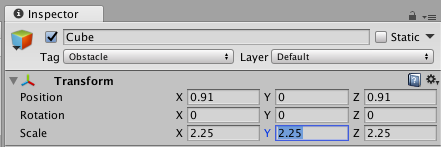
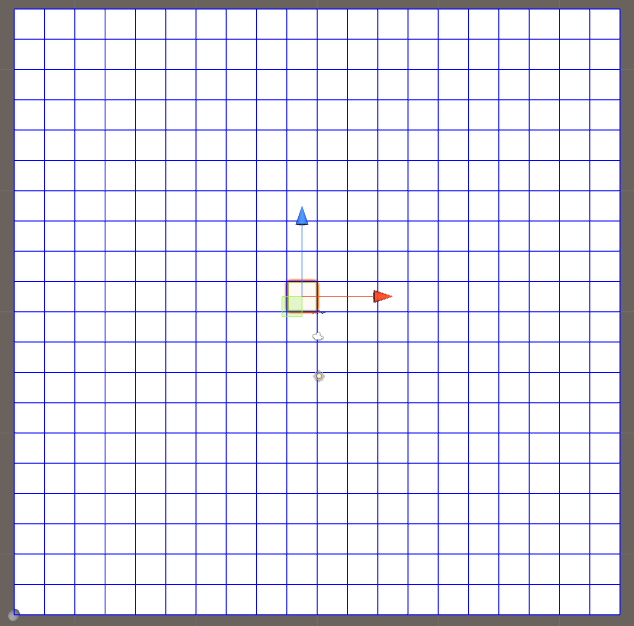
Turn on the grid in your 'AStarGridManager' object, and also let's create a new empty Game Object and change its label to 'Obstacles'. Set the attributes of the new cube you created to
those depicted below, you should have one code obstacle in your scene now. The screen shots below will guide you through this series of steps.

Adding a new cube to our scene.

Our Hierarchy window with our obstacle cube in a parent GameObject.

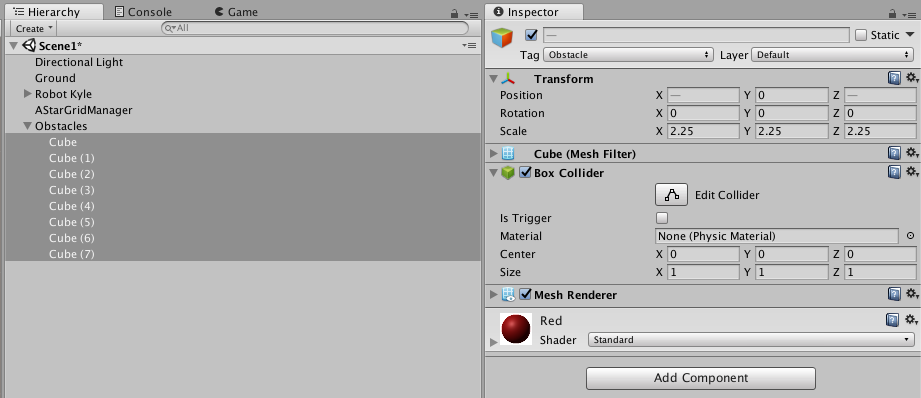
The transform attributes of our obstacle cube.

Our current scene with one obstacle.
Now what we want to do is copy our cube a bunch of times and divide up the board in such a way that the path finding code has something challenging to solve.
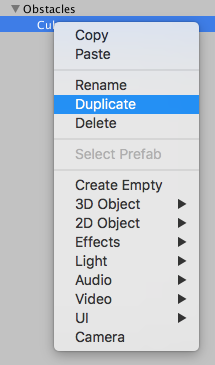
Each time you want to make a new Game Object use the duplicate command, try and keep the obstacles you create within the grid lines. Make sure to save your
scene and project when you are done. My obstacle implementation is shown below.

Quickly duplicating Game Objects in the Hierarchy window.
You'll notice it's kind of difficult to see the white obstacle cubes on the white ground we created earlier. Let's create some simple materials
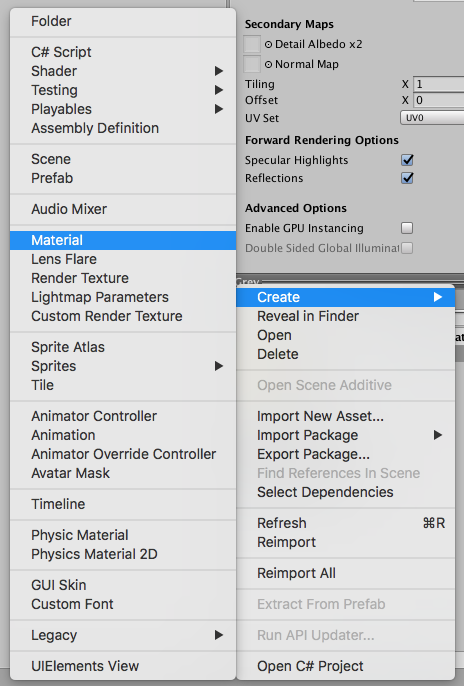
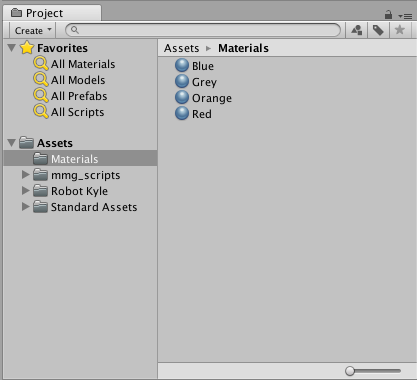
to help us differentiate our objects better. In the Project window create a new folder and name it 'Materials'. Select the new 'Materials' folder and right
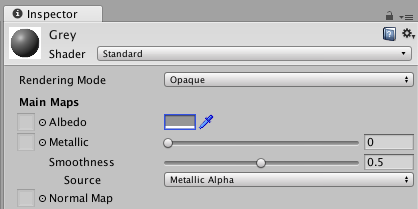
click in the empty space, select 'Create' then select 'Material' as shown in the screen shot below. Name the new material Grey and set a grey color where you see
a white square at the top of the Inspector window. Clicking in that square will let you choose a color from the color selection popup. Repeat this process and create a
red material. Select the 'Ground' from the Hierarchy view and drag and drop the new material onto its Inspector window, alternately you could click 'Add Component' and search and
add the Grey material. Now select all the obstacle cubes you've create so that they are all highlighted and drag and drop the Red material on them, they will all get the new Red
material in one step. Now we can see our obstacles better! Look at the screen shots below if you have trouble completing these steps.

Creating a new simple material.

Setting the material's color.

Quickly duplicating Game Objects in the Hierarchy window.
I ended up making something like 32 duplicates and positioned them around the screen in such a way that there won't be a clear path from the starting position
to the end position. Let's create two new tags following the process we used before, call these tags 'Start' and 'End'.
Now create two new materials using the process that we outlined above. Create an Orange material and a Blue material.
And finally let's create two new cubes, you can just duplicate your obstacle cube again. Move them from the Obstacles Game Object into the Hierarchy root.
Name one of them 'Start' by adjusting its lable in the Inspector window, and give it the Orange material. Change the other cube's label to 'End' and give it
the Blue material. Take a look at the screen shots below and make sure you have things setup correctly.

Our materials, make sure to give the Start and End Game Objects the proper color and tag..

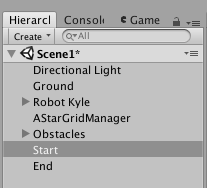
Make sure your Hierarchy window looks similar to this one, notice the Start and End Game Objects.

Your scene should look something like this.
We're almost there, just a little bit more to do. Let's create another empty Game Object in our Hierarchy window and set it's label to 'AStarTestCodeStatic'.
You guessed it we're going to drag and drop the script in mmg_scripts that has the name 'AStarTestCodeStatic' onto the object we just created.
Now run your Scene by pressing play and although Robot Kyle just stands there swinging left and right, if you look at the Scene window you should see
a green line connecting the Start cube to the End cude. Woot!! We're gonna do a little bit more with this in the next tutorial.

Robot Kyle isn't doing much, but there should be a path found and displayed on yout Scene window. If so congrats!
